Hello Friends. For those of you living with IBS, could you help my gastroenterology colleagues that are working to better understand the needs of patients with IBS from Campbell University School of Health Science and Stony Brook University Medical Center by participating in this survey about IBS symptoms, stigma, and the patient/provider relationship? Participation is […]
Continue Reading
 Got IBS? Check out the upcoming
 IBS Warrior Summit!
by katescarlata on
Hello Friends! I wanted to share an upcoming program hosted by my colleague, Erin Judge RD, during IBS Awareness month! The IBS Warrior Summit is a webinar series in April to bring the IBS community together to connect, learn, and empower each person with more confidence in their IBS care. This is a free event […]
Continue Reading
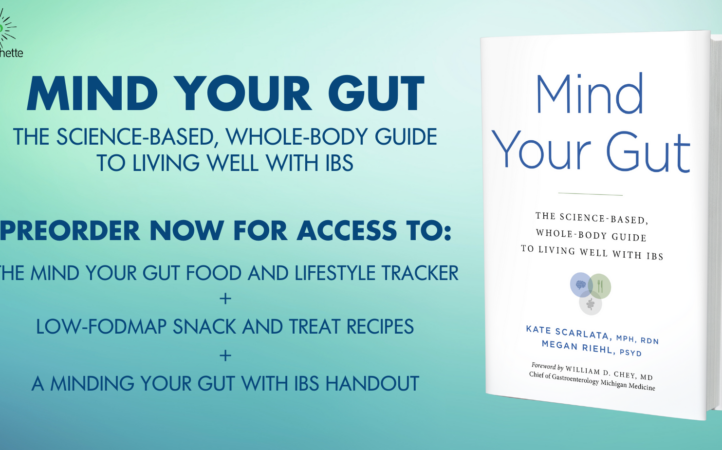 Pre-order the book, Mind Your Gut for exclusive extra content
by katescarlata on
hello friends! I just wanted to share that if you pre-order my latest co-authored book before March 4th–you gain access to some exclusive free content. Mind Your Gut: The Science-based, Whole-body Guide to Living Well with IBS written by me along with my esteemed colleague, GI psychologist, Dr. Megan Riehl provides a comprehensive holistic approach […]
Continue Reading
 Upcoming Exciting News and Programs!
by katescarlata on
Hello Friends! Just a quick hello to share some news! First off, my new book, Mind Your Gut: The Science-based, Whole-body Guide to Living Well with IBS is available for preorder! The publication date is March 5, 2024. I co-wrote this book with GI psychologist Dr. Megan Riehl and it is a first of its […]
Continue Reading
 Check out my podcast interview with Healio Gastroenterology
by katescarlata on
A big thanks to Healio Gastroenterology for the opportunity to discuss the “why” behind my choice to specialize in GI nutrition along with other key factors in my growing up experience that helped shape my career (including being the youngest of nine kids, my emergent intestinal resection + more). I talk about my patient advocacy […]
Continue Reading
 Requesting help with IBS research survey
by katescarlata on
Happy Tuesday, Friends. I am sharing a research survey request from one of my colleagues. If you have IBS and can find some time to fill out the survey, you will be advancing our understanding the role of stigma in IBS. See details below. You are being asked to participate in a research survey voluntarily […]
Continue Reading
 Please Help Us with a GI-related Research Study
by katescarlata on
Hello Friends, We are conducting a survey of adults who have a gastrointestinal (GI) disorder or condition. GI refers to disorders of the esophagus, stomach, and intestines. We are specifically looking for individuals who have been diagnosed with Irritable Bowel Syndrome (IBS), Inflammatory Bowel Disease (IBD; including Crohn’s Disease, Ulcerative Colitis, and indeterminate colitis), Gastroesophageal […]
Continue Reading
 IBS Awareness Month Events 2023
by katescarlata on
Hello Everyone! April is IBS Awareness Month and I have a couple of upcoming events and updates I would like to share with you. First up, Tuesday Night IBS will provide a wonderful sponsored webinar on IBS on World IBS Day, April 19, 2023. The topic is IBS Updates: Myths, Mimickers and the Patient Journey. […]
Continue Reading
 Patient and Clinician Educational Opportunity!
by katescarlata on
Tuesday Night IBS provides educational webinars for clinicians and patients on various topics related to IBS. Tuesday Night IBS is made up of patients and providers that are working together to improve the lives of people living with IBS via a number of different initiatives. Tuesday Night IBS partners collectively work as IBS patient advocates. […]
Continue Reading